Spring Gardening for Urban Dwellers: Budget‑Friendly Container Ideas & Low‑Maintenance Plants

What’s the easiest way to bring spring greenery to a tiny apartment?
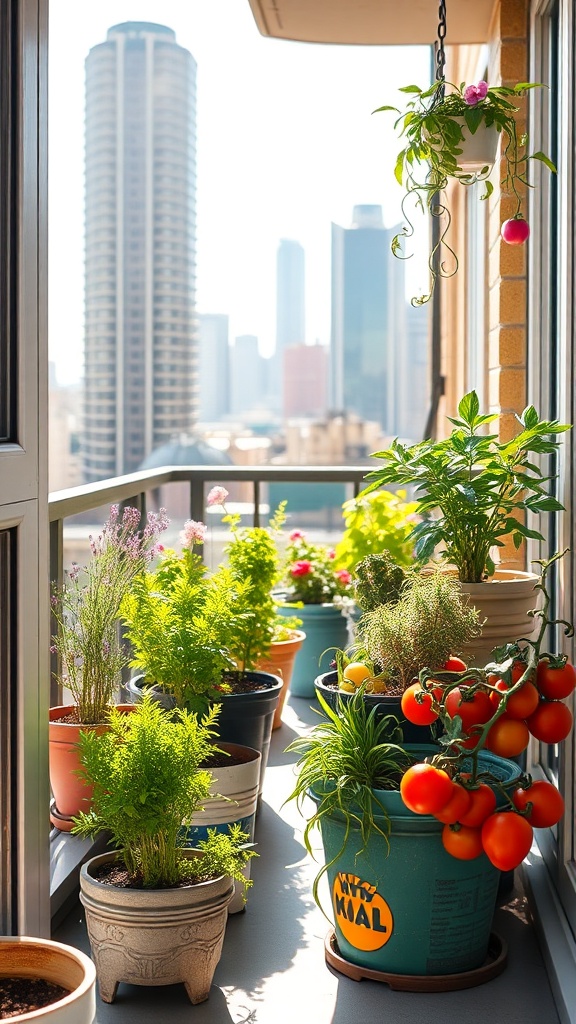
When the city finally thaws, I’m the first to scramble for a sunny windowsill or balcony. My apartment’s only garden space is a narrow ledge, but with a few clever containers and hardy plants, that ledge becomes a mini‑ecosystem. No yard, no problem.
Why does container gardening matter for sustainable urban living?
Growing your own herbs, greens, or even a few fruiting plants cuts down on grocery trips, reduces packaging waste, and gives you fresh flavor right at the source. It also lets you practice the “respect over authenticity” philosophy I champion – you don’t need a full‑scale farm to honor a cuisine’s roots.
Which containers give the biggest bang for my buck?
I’ve learned (the hard way) that cheap doesn’t have to mean flimsy. Here are three budget‑friendly options I keep in my pantry:
- Recycled glass jars – perfect for herbs. Wash, add a layer of gravel, then potting mix. I snag these at H‑Mart for a few dollars (see my H‑Mart vs. Patel Brothers guide).
- Terracotta saucers with saucer‑bottoms – cheap, breathable, and they look great stacked. Pair with a drip tray to avoid water damage.
- DIY wooden box – reclaimed pallet wood, lined with a plastic liner. I built one for under $20 using a tutorial from my budget spice‑rack guide.
What low‑maintenance plants thrive on a balcony in spring?
Choosing plants that tolerate occasional neglect is key. Here are my go‑to picks, all of which can survive a missed watering:
- Herbs: Basil, cilantro, and Thai basil – they love bright light and shallow containers. A quick tip: trim the tops daily; the plant thinks it’s being harvested and keeps producing.
- Succulents: Echeveria, Haworthia, and jade plant – they store water in leaves, so they’re forgiving during a dry spell.
- Cherry tomatoes (dwarf ‘Tiny Tim’) – they need a deeper pot (12‑inches) and a bit of staking, but the payoff of fresh bite‑size tomatoes is worth the effort.
- Edible flowers: Nasturtiums – they add a peppery bite to salads and attract pollinators, which helps your herbs thrive.
How do I set up a container garden step‑by‑step?
Follow this simple workflow. I’ve written it as a checklist so you can tick each box as you go.
- Pick the spot. South‑facing windows or a balcony that gets at least 5‑6 hours of direct sunlight.
- Choose containers. Use the options above; ensure each has drainage holes.
- Layer the base. Add a 1‑inch layer of gravel or broken pottery for drainage.
- Fill with high‑quality potting mix. I trust the “seed‑starting mix” from my local garden center – it’s lightweight and nutrient‑rich.
- Plant wisely. Space herbs 4‑6 inches apart, succulents 3‑4 inches, and tomatoes at least 12 inches deep.
- Water correctly. Water until it drains out the bottom, then let the top inch of soil dry before the next watering.
- Feed. A liquid fertilizer diluted to half strength once a month keeps growth vigorous.
- Monitor. Look for yellowing leaves (over‑watering) or wilted tips (under‑watering). Adjust accordingly.
What are some pro‑tips to keep the garden thriving?
- Rotate containers weekly so each side gets equal sun exposure.
- Use a simple budget‑tracking spreadsheet to log water and fertilizer usage – it’s surprisingly satisfying.
- Mix a pinch of crushed eggshells into the soil for calcium, which helps tomatoes avoid blossom‑end rot.
What’s the next step after your balcony blooms?
Once you’ve mastered the basics, expand outward. Try a vertical garden using hanging shoe organizers, or experiment with micro‑greens on a windowsill. The city’s concrete becomes a canvas.
Takeaway
Spring urban gardening doesn’t require a backyard or a big budget. With a few recycled containers, hardy plants, and a bit of scientific curiosity, you can grow fresh herbs, tasty tomatoes, and vibrant flowers right where you live. Start small, track your progress, and let the green habit grow alongside your culinary experiments.