How to Make Your Own Homemade Chili Oil

A diner orders a bowl of plain steamed dumplings, but the experience feels incomplete without a pungent, spicy kick. They reach for a bottle of store-bought chili oil, only to find it lacks the crunch, the deep aromatic complexity, and the specific heat level they crave. Making your own homemade chili oil solves this problem by allowing you to control the heat, the texture, and the flavor profile to suit your specific palate. This guide provides a technical breakdown of how to create a professional-grade chili oil at home using high-quality ingredients and precise temperature control.
The Essential Components of Chili Oil
To create a balanced chili oil, you must understand the three pillars of the recipe: the base oil, the aromatics, and the chili flakes. Each component plays a specific role in the final texture and flavor profile. If one is out of balance, the entire batch will either be too greasy, too bitter, or one-dimensional.
Selecting the Right Oil
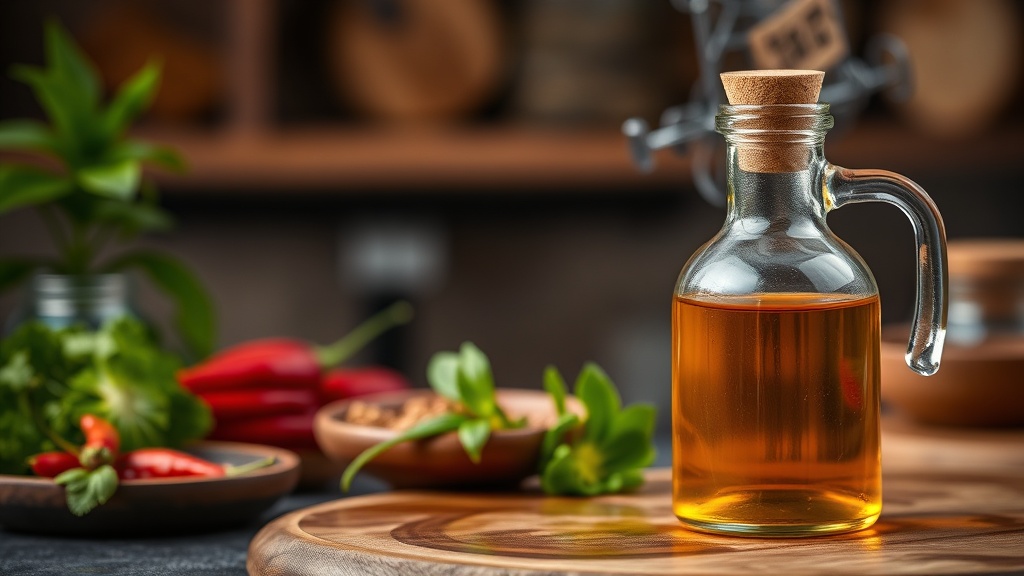
The oil serves as the carrier for both heat and flavor. You need an oil with a high smoke point and a neutral flavor profile so it does not compete with the spices. Grape seed oil, canola oil, or peanut oil are the best choices. Avoid extra virgin olive oil, as its low smoke point and strong flavor will result in a bitter, unpleasant oil. If you want a subtle nutty undertone, peanut oil is the industry standard for many Asian-inspired recipes.
Choosing Your Chili Flakes
The type of chili you use dictates the "crunch" and the heat level. For a traditional Sichuan-style oil, look for Gochugaru or crushed red pepper flakes that have been coarsely ground. You want a mix of textures: fine powder for color and infusion, and larger flakes for that essential crunch. If you use a pre-ground chili powder, the oil will be very red but will lack the textured bits that make the oil satisfying on noodles or eggs. For a more intense heat, look for dried Thai bird's eye chilies, but ensure they are crushed rather than pulverized into a fine dust.
The Role of Aromatics
Aromatics are infused into the hot oil to provide depth. Common additions include star anise, cinnamon sticks, bay leaves, Sichuan peppercorns, and garlic. These ingredients do not stay in the final product; they are used to flavor the oil during the heating process. It is vital to understand why you should toast your whole spices before adding them to the oil, as this step releases the essential oils and ensures a more potent infusion.
Equipment and Ingredients List
Before beginning, gather the following tools and ingredients to ensure a smooth process. Precision is key when working with hot oil.
- Digital Thermometer: Essential for monitoring oil temperature to prevent burning the spices.
- Fine Mesh Strainer: To remove aromatics and large debris.
- Heat-Resistant Glass Jar: For storing the finished product.
- Neutral Oil: 2 cups (Grape seed or Peanut oil).
- Chili Flakes: 1/2 cup (a blend of coarse and fine flakes).
- Aromatics: 3 cloves of smashed garlic, 1 cinnamon stick, 2 star anise, 1 tablespoon of Sichuan peppercorns, and 1 shallot (sliced).
- Salt: 1 teaspoon of sea salt or kosher salt.
- Optional: 1 teaspoon of toasted sesame oil for a finishing touch.
Step-by-Step Instructions
Follow these steps carefully. The most common mistake in making chili oil is overheating the oil, which leads to a bitter, burnt taste rather than a savory, spicy one.
Step 1: Prepare the Dry Mixture
Place your chili flakes and salt in a heat-proof glass bowl or a heavy-bottomed ceramic bowl. Do not add the spices to the pot while heating; instead, place the dry ingredients in the bowl where the hot oil will eventually be poured. This prevents the spices from burning on the bottom of the pan. If you are using very fine chili powder, ensure it is well-distributed to avoid clumping.
Step 2: Infuse the Oil with Aromatics
In a small saucepan or a deep skillet, combine your neutral oil with the garlic, shallots, star anise, cinnamon stick, and Sichuan peppercorns. Turn the heat to medium-low. You want to slowly extract the flavors without scorching the ingredients. As the oil heats, the garlic and shallots will begin to turn golden brown. Once they are crispy and golden (not dark brown), the infusion is nearly complete.
Step 3: Temperature Control and Pouring
This is the most critical stage. Using your digital thermometer, check the temperature of the oil. You are aiming for approximately 325°F to 350°F (160°C to 175°C). If the oil is hotter than 375°F, it will burn the chili flakes instantly upon contact, creating a harsh, acrid flavor.
Once the oil reaches the target temperature, turn off the heat. Use a slotted spoon to carefully remove the large aromatics (garlic, shallots, cinnamon, star anise) and discard them, or keep them if you prefer a more rustic texture. Slowly pour the hot oil over the chili flakes in your heat-proof bowl. It should sizzle, but not smoke aggressively. Stir gently to ensure all flakes are coated.
Step 4: Cooling and Flavoring
Let the oil sit at room temperature for at least 30 minutes. This allows the heat to continue to mellow the spices and develop the color. If you want to add a nutty finish, stir in a teaspoon of toasted sesame oil once the oil has cooled significantly. If you want a more "umami" profile, you can add a small amount of fermented black beans or a dash of soy sauce, though this will change the shelf life of the oil.
Troubleshooting Common Issues
Even with precise measurements, variables like heat intensity and spice quality can affect your results. Here is how to fix common errors:
- The oil tastes bitter: This is almost certainly caused by overheating the oil or the spices. If the oil was too hot, the chili flakes scorched. To mitigate this, you can try adding a tiny pinch of sugar to the finished oil to balance the bitterness, but usually, a burnt flavor cannot be fully reversed. Next time, lower your heat earlier.
- The oil is too thin or greasy: This often happens if the chili flakes were too fine or if the oil wasn't infused long enough. Ensure you use a variety of flake sizes to provide structure.
- The color is pale: The color of the oil comes from the heat extraction of the chili pigments. If it is pale, your oil temperature was likely too low. Aim for the 325°F–350°F range.
- The oil has no "zing": If you want that characteristic numbing sensation, you need more Sichuan peppercorns. Ensure they are high quality and have been lightly toasted.
Storage and Shelf Life
Proper storage is essential for both safety and flavor preservation. Store your homemade chili oil in a clean, airtight glass jar. While the oil is shelf-stable for a few weeks if kept in a cool, dark pantry, the best way to maintain the vibrant color and prevent the oil from going rancid is to store it in the refrigerator.
Safety Note: Because this recipe uses fresh aromatics like garlic and shallots, there is a minor risk of botulism if the oil is stored at room temperature for extended periods. To be safe, ensure all aromatics are fully cooked and crispy before pouring the oil over the chilies, and always use a clean, dry spoon when scooping the oil out of the jar to avoid introducing moisture.
Using your homemade chili oil on everything from avocado toast to ramen transforms a standard meal into something exceptional. By controlling the ingredients and the temperature, you move beyond the limitations of store-bought products and create a staple that is uniquely yours.
Steps
- 1
Infuse the Oil with Aromatics
- 2
Prepare the Dry Spice Mix
- 3
Temper the Hot Oil
- 4
Cool and Store