Making Your Own Quick Pickles at Home

Imagine you're eating a heavy, savory burger or a rich bowl of street tacos, and the flavors feel a bit flat. You need that sharp, acidic punch to cut through the fat and brighten the whole dish. That's where quick pickles—also known as refrigerator pickles—come in. This guide explains how to make your own quick pickles at home using a simple brine method that works for cucumbers, red onions, carrots, or even radishes. You don't need a pressure canner or a massive pantry of specialized equipment to do this; you just need vinegar, sugar, salt, and a bit of heat.
Most people think pickling requires a week of waiting or a complex fermentation process. That's a mistake. Quick pickles use a "vinegar brine" method that delivers a crunchy, tangy result in as little as thirty minutes. It's the fastest way to transform a basic vegetable into a gourmet topping for your sandwiches or salads.
What Is the Difference Between Quick Pickles and Fermented Pickles?
Quick pickles use vinegar and sugar to preserve vegetables through acidity, whereas fermented pickles rely on natural lactic acid bacteria produced through a salt-water brine. If you want immediate results, go with the vinegar method. If you want complex, funky flavors and probiotic benefits, you'll want to look into traditional fermentation.
Quick pickles are essentially "pickled in a jar" for immediate consumption. They are much higher in acidity and have a much shorter shelf life. You'll keep them in the refrigerator, and they'll stay good for a few weeks. Fermented pickles (like the ones you find in a deli) are aged over longer periods and can sit on a shelf if processed correctly. For most home cooks, the quick method is far more practical for everyday cooking.
Here is a quick breakdown of the two styles:
| Feature | Quick Pickles (Refrigerator) | Fermented Pickles (Lacto-Fermentation) |
|---|---|---|
| Primary Acid Source | Vinegar (Acetic Acid) | Lactic Acid (Natural) |
| Flavor Profile | Sharp, bright, and consistent | Complex, sour, and funky |
| Time Required | 30 minutes to 2 hours | Days to weeks |
| Storage | Must be refrigerated | Can be shelf-stable if canned |
How Do You Make a Basic Quick Pickle Brine?
A basic quick pickle brine consists of a ratio of vinegar, water, salt, and sugar to create a balanced, tangy liquid. For most vegetables, a 1:1 ratio of vinegar to water is the standard starting point. You can adjust this based on how much "zing" you want in your final product.
I usually reach for Apple Cider Vinegar from Bragg when I want a fruitier undert-tone, but White Distilled Vinegar is better if you want a clean, sharp profile that won't turn your vegetables a weird color. If you're pickling cucumbers, stick to white vinegar or a light-colored cider vinegar to keep that classic look.
The Standard Quick Pickle Formula
- The Liquid Base: 1 cup vinegar (White, Apple Cider, or Rice Vinegar) and 1 cup water.
- The Seasoning: 1 tablespoon kosher salt (avoid table salt with iodine as it can make the brine cloudy) and 1-2 tablespoons of sugar.
- The Aromatics: This is where you get creative. Think garlic cloves, peppercorns, mustard seeds, or dried chili flakes.
Don't be afraid to experiment with the spices. If you're making red onion pickles for tacos, a pinch of cumin and some crushed red pepper flakes works beautifully. If you're doing cucumbers for a deli sandwich, stick to dill and garlic. The beauty of this method is that the brine is a blank canvas.
One thing to watch out for: if you use too much sugar, you'll end up with a dessert-like vegetable. If you use too much salt, it will be unpalatable. I've found that starting with a 1:1 ratio of water to vinegar and adding sugar to taste is the safest bet. It's much easier to add sweetness later than to try and fix a brine that's too sweet.
What Vegetables Work Best for Quick Pickling?
Almost any firm, crunchy vegetable can be pickled using this method, provided it has enough structural integrity to withstand the heat of the brine. The key is to ensure the vegetable isn't too soft or watery before you start.
Here are my top recommendations for different culinary uses:
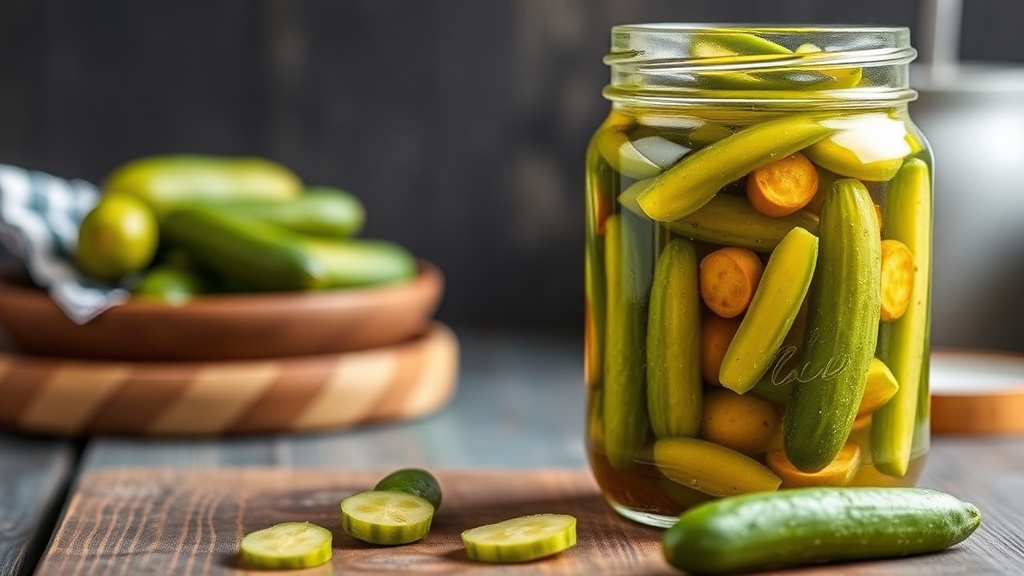
- Red Onions: Perfect for tacos, grain bowls, or salads. They turn a beautiful bright pink after a few hours in the brine.
- English Cucumbers: The gold standard. Use thin slices or spears for a classic pickle chip.
- Carrots: Great for adding a sweet, crunchy element to appetizers. Slice them into thin matchsticks (julienne) so they absorb the brine faster.
- Radishes: These provide a sharp, peppery bite that is incredible on top of a heavy steak or a salad.
- Green Beans: If you blanch them for a minute first, they make a fantastic crunchy snack.
If you're working with tougher vegetables like carrots or parsnips, you might want to blanch them in boiling water for about 60 seconds before putting them in the jar. This softens the cell walls slightly, allowing the brine to penetrate the center of the vegetable more effectively. It's a small step, but it makes a massive difference in texture.
Speaking of texture, if you want to ensure your pickles stay crunchy, avoid using a low-quality vinegar. High-quality ingredients lead to better results. When I'm making a heavy meal, I often use the leftover brine to deglaze a pan—it's a great way to add acidity to a sauce, much like the technique used for pan sauces. Just be careful with the salt levels if you do this.
Common Mistakes to Avoid
The most frequent error is using salt that contains anti-caking agents or iodine. Table salt can react with the vinegar and create a murky, unattractive liquid. Always reach for Kosher salt or Sea salt. It's much cleaner and will keep your brine looking crystal clear.
Another mistake is not heating the brine sufficiently. You aren't just mixing these ingredients; you're creating a solution. The salt and sugar need to be fully dissolved in the hot liquid before you pour it over the vegetables. If you see grains of salt at the bottom of your jar, you didn't heat it enough. This results in an unevenly seasoned vegetable that tastes bland in the middle.
Wait—are you using a metal spoon to stir your brine? If you are, stop. The acidity of the vinegar can react with certain metals, potentially leaching a metallic taste into your pickles. Use glass, ceramic, or high-quality stainless steel. It's a small detail, but it matters for the flavor profile.
One more thing: don't skip the cooling step. While you can pour hot brine over vegetables for a faster soak, it can sometimes "cook" the vegetable too much, leaving you with something mushy rather than crunchy. If you want that signature snap, let the brine cool to at least room temperature before pouring it over your vegetables and sealing the jar.
If you're ever unsure about the safety of your ingredients, you can check the CDC guidelines on food-borne illnesses to ensure you're handling your produce and storage correctly. While quick pickles are generally very safe because of the high acidity, hygiene is always a factor in any kitchen.
Once your jar is sealed, pop it in the fridge. The longer it sits, the more intense the flavor becomes. Most vegetables are at their peak after 24 to 48 hours. After that, the texture might begin to soften, so keep an eye on them. If you find your vegetables are losing their crunch too quickly, try reducing the amount of heat you use when pouring the brine.
Steps
- 1
Prepare Your Vegetables
- 2
Boil the Brine
- 3
Pack the Jar
- 4
Pour and Chill